Pocket Loom Instructions
Step 1: Start warping the loom
-

Don't cut any yarn off yet. Set your loom with the flat side facing up, and pull the end of your yarn into the V notch further away from you on one side, with the rest of your yarn going under the loom. Leave about 1" or 2.5cm of yarn as a short tail above the loom.
-

Pull the long side of the yarn through the other notch, making sure it's tight in each notch.
-

Take your yarn across the short tail and up to the nearest warp notch.


Step 2: Warp the loom
-

Flip the loom over so the flat side is facing away from you. Pull the yarn across the loom to the other side, and into the first warp notch on that side. Keep the yarn under a little bit of tension, but not so much that you squeeze the sides of the loom together.
-

Continue wrapping the yarn around in a spiral, through each warp notch. If you notice the loom starting to deform or bend in any way, your yarn is too tight.
-

Wrap around through every warp notch until you reach the other side. If you only want to weave across part of the loom (for example, if you're making a bookmark), just warp the loom for that width.


Step 3: Finish warping the loom
-

Pull the yarn through the V notch opposite the warp notch you ended with. Make sure the yarn is tight in this notch.
-

Flip the loom over and pull the yarn through the other V notch. Cut the yarn about 1" or 2.5cm from the notch.
-

Tuck the cut end under the diagonal bit of yarn to keep it secure.


Step 4: Set up to weave
-

Take the heddle roller and start working it under the warp from one side - it doesn't matter which side.
-

You may need to twist the roller around to get it under all the warp yarn.
-

Once the roller is all the way through, you'll need to orient it correctly. If it looks like this picture, it's upside down.
Slide the roller all the way to the top of the loom, past the two small bumps.


-

Each warp yarn should fall into a slot in the roller. Some yarns may fall into the neighboring slots.
-

Make sure each slot only has one warp yarn in it, and that the heddle roller is positioned so that half the warp yarns are slightly higher than the others.


Step 5: Prep your yarn
-

For needles
Measure out a few armspans' worth of yarn from your yarn ball. Thread one end of this through your needle. The more yarn you use, the less you'll have to tie knots to connect new pieces, but the more you'll have to pull through with each row and the more likely it is to tangle.
-

For shuttles
Wrap your shuttle with yarn several times. You want enough yarn that you won't be re-winding your shuttle every few rows, but not so much that the yarn makes it thicker than one of your fingers. Too much yarn can make it hard to pull through with each row.


Step 6: Weave
-

Take your needle or shuttle and start threading it through the warp, in the narrow space between the upper and lower warp threads. It doesn't matter which side you start from, or which side the heddle roller is set to. The yarn on your needle is called the "weft."
-

Pull the weft through until there's about 1" or 2.5cm remaining.
-

Use the comb to pack the first row of weft down against the edge of the loom.


-

Roll the heddle roller to the other side to change which set of yarns is up and down. This is called "changing the shed."
-

Optional: Weave the short tail of the weft through as though it's part of the next row to secure it in place.
-

Optional: Pack the weft tail down against the first row.


-

Thread the needle through from the other side.
-

Leave a little triangle-ish gap in the weft with each row. Use the notch built into the needle as a guide to tell you how high to make the gap. If you just take your weft straight across, the edges of your weaving will pull in too much.
-

Pack the new row of weft down against the first row.


-

Roll the heddle roller to the other side to change the shed.
-

Pull your weft across and through, leaving a hump in it.
-

Pack the new row down against the previous one, change the shed again, and keep going!


Step 7: Secure the end
-

Remove the heddle roller, then use your yarn tail as a guide to manually weave the needle up and down through enough warp to secure it.
-

Pull the tail through the needle's eye.
-

Pull the needle through, and use the comb to pack the tail down against the previous row.


Step 8: Tie off the ends
-

Don't just cut all the warp off your loom all at once. If you do, you risk the weft coming out before you can tie everything off securely.
-

Flip the loom over so the flat side is facing up and remove one end of your warp from the V notches.
-

To group your warp yarns into pairs for fringe, cut just the first warp yarn. If your loom has an odd number of warp yarns, you may need to do some math to find the grouping that works best.


-

Flip the loom over again. Use an overhand knot to tie the cut warp yarns together.
-

When tightening the knot, it helps to pinch it as close to the weaving as you can.
-

Flip the loom over, and cut just the next warp yarn (for pairs) or the next set (for other groupings).


-

Flip the loom over again. Use an overhand knot to tie the cut warp yarns together.
-

Continue cutting warp threads one at a time and tying them off on each side until you've done them all.
-

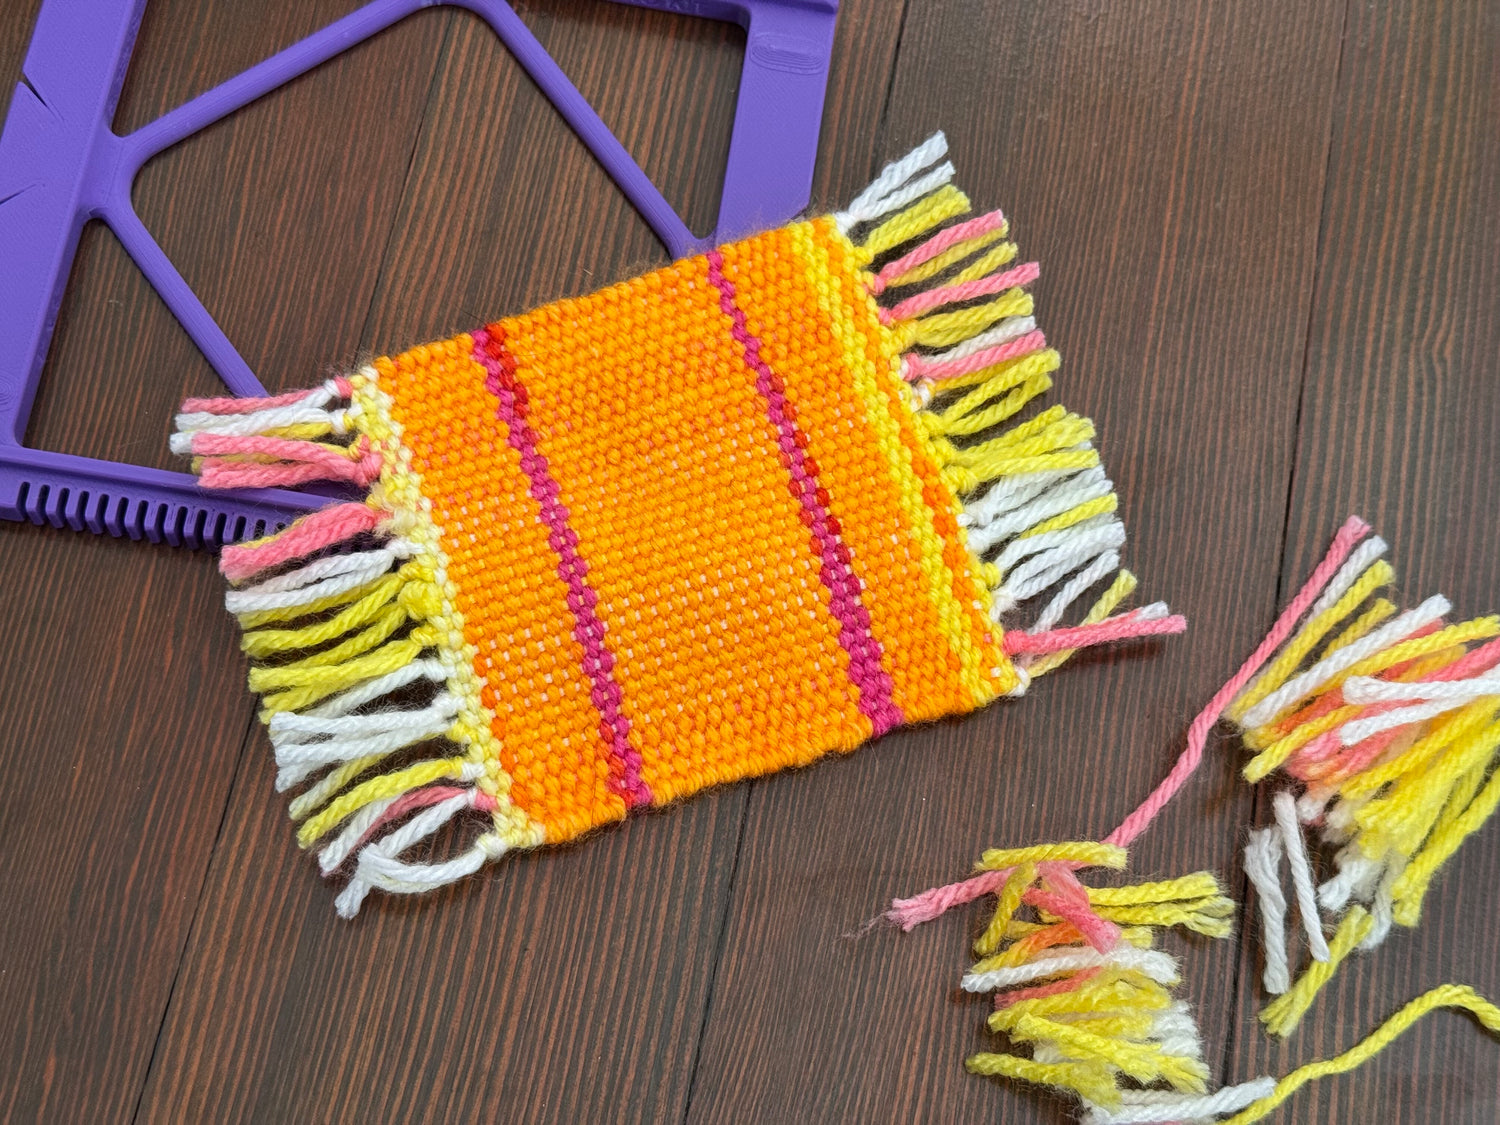
Tidy up the fringe by cutting it all to the same length.


Congratulations!
You've finished weaving with the pocket loom!
Make sure to safely pack away all the parts of the loom so that you don't lose any pieces:
- Loom
- Needle or shuttle
- Heddle roller
- Comb
If your yarn trimmings are 100% natural fibers, you can compost them. Otherwise, they'll need to go in the trash, or you can save them for stuffing for amigurumi or projects like that.